
Roasting coffee at home brings the joy of fresh, customizable flavors. Yet, it comes with risks like common coffee roasting errors. Even experienced roasters face issues like scorching, underdevelopment, or bitter flavors. This guide aims to help you steer clear of these pitfalls and master the craft with confidence.
Mistakes such as improper temperature control and neglecting equipment maintenance can ruin batches. Over 70% of roasters admit to skipping bean research, while 60% overlook the learning curve of their equipment. But, by being aware of these Coffee Roasting Mistakes, you can improve the taste of your brews. Learn to spot defects like quakers or baking, and adjust roasting times for beans like dense Brazils or delicate naturals.
Key Takeaways
- Scorching and tipping often stem from high charge temperatures and poor airflow.
- 70% of roasters skip green bean research, leading to inconsistent results.
- Proper cooling and degassing boost flavor by up to 70%.
- Regular equipment cleaning cuts fire risks by 60%.
- Tracking RoR and first crack timing prevents underdevelopment.
Understanding the Coffee Roasting Process
Mastering coffee roasting begins with the basics. tips for successful coffee roasting start with choosing high-quality green beans. Many beginner coffee roasting mistakes come from overlooking these foundational steps. Let’s explore the essentials every roaster needs to know.
Green Coffee Beans: The Foundation of Flavor
Green beans vary greatly. Their origin, elevation, and processing method influence their potential. For example, beans from high-altitude farms are denser and harder, requiring longer roast times. A key tip is to research your beans’ background. Did you know 70% of roast defects come from neglecting environmental factors like soil type and climate? Always align roast techniques with bean origin.
Temperature: The Roaster’s Compass
Temperature control is crucial for transforming beans into flavor. Here are tips to avoid common mistakes:
- Preheat your machine: 50% of home roasters skip this, leading to inconsistent results.
- Use conduction (direct contact) or convection (air flow) for even heat distribution.
- Monitor Rate of Rise (ROR) to prevent over/under-roasting.
Quick fix: Use a thermometer with a 3-4mm probe for accurate readings and timing.
Three Key Roasting Stages
| Stage | Temperature Range (°C) | Description |
|---|---|---|
| Drying | 160–200°C | Removes moisture, prepares beans for chemical changes. |
| Browning | 200°C+ | Maillard reactions create flavor and aroma compounds. |
| Development | 230°C+ | Beans expand, crack, and reach desired roast level. |
Be attentive to the first crack. This audible signal signals the transition from light to medium roasts. Ignoring this step results in underdeveloped flavors.
Overlooking Roast Profiles
Ever found it hard to get a perfect roast? Roast profiles are your key to success. They track bean temperature, time, and rate of rise (RoR), leading to consistent results. Mastering this is crucial for avoiding common coffee roasting mistakes and improving your skills.
What Are Roast Profiles?
Roast profiles detail every step of the roasting process. They capture:
- Temperature curves and RoR (rate of rise)
- Timing of first crack and color shifts
- Bean development stages
Why Consistency Matters
70% of roasting defects come from inconsistent profiles, leading to off-flavors. “A 2℃ variance can turn a bright Ethiopian into a bitter mess,” notes Master Roaster Ana Sortis. Achieving consistency ensures every batch meets your high standards.
Tips for Creating a Roast Profile
Here are steps to improving coffee roasting techniques:
- Begin with profiles suited to your bean type (e.g., light roast ends 30s post-first crack)
- Record temperature every 30 seconds during roasting
- Adjust slowly—try 5℃ increments when tweaking
- Match with tasting notes to align data with flavor outcomes
| Roast Type | End Point | Flavor Notes |
|---|---|---|
| Light Roast | 30 seconds post-first crack | Fruit-forward, floral |
| Medium Roast | 1-2 minutes post-crack | Nutty, balanced |
| Dark Roast | 3+ minutes post-crack | Chocolatey, smoky |
Remember, every bean is unique. Keep detailed records of each session to continually refine your profiles.
Ignoring Freshness of Beans
Expert coffee roasting advice begins with fresh green beans. Stale beans can spoil even the most precise roast. Best practices for coffee roasting start long before the roaster heats up. Let’s dive into how freshness impacts every step.
The Impact of Stale Beans on Flavor
Old beans lose their vibrant flavors, leaving behind dull or bitter notes. Stale beans roast unevenly, leading to inconsistent batches. Over time, off-flavors like papery or musty aromas dominate, hiding the bean’s true taste.
The first crack timing changes, affecting development and acidity.
How to Properly Store Coffee Beans
Follow these steps to maintain peak quality:
- Store in airtight containers with one-way valves to release CO2
- Keep in a cool, dark place—away from light and humidity
- Avoid refrigerators; temperature fluctuations cause condensation
Properly stored green beans stay fresh for 6-12 months. Use food-grade buckets or GrainPro bags for longer shelf life.
Signs That Your Beans Are Past Their Prime
Look out for these warning signs:
- Faded green color turning yellowish
- Musty or fermented odors
- Uneven bean size or cracks
- Loss of natural oils on bean surface
Ignoring freshness risks wasting time and resources. Old beans never reach their full flavor potential. No amount of roasting skill can revive stale inventory.
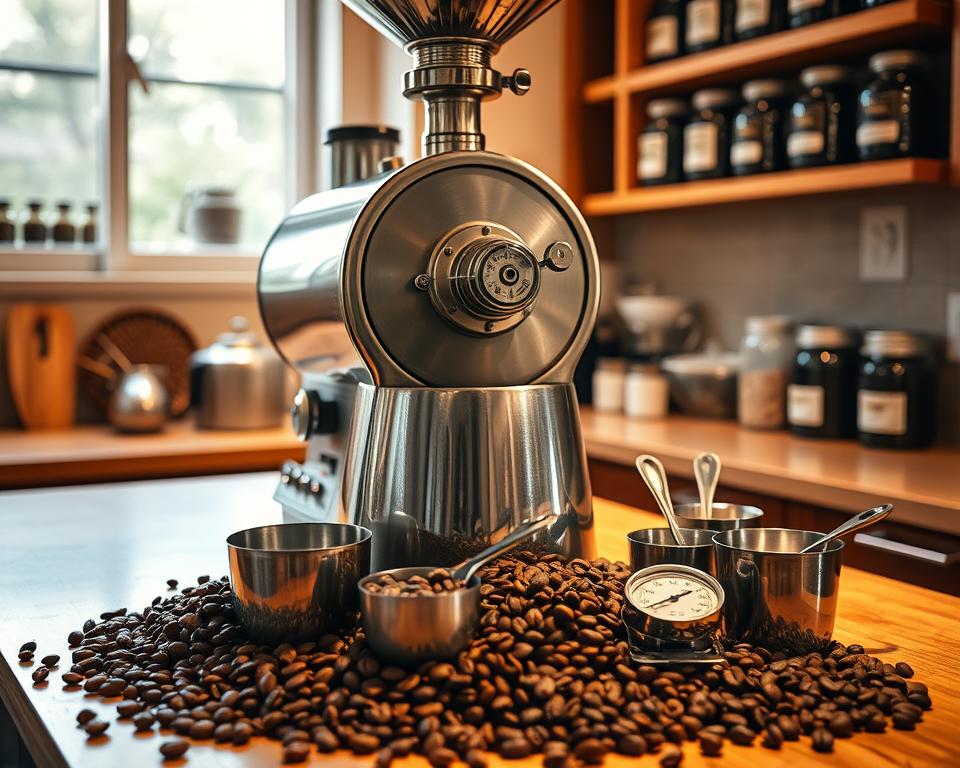
Wrong Roasting Equipment Selection
Choosing the right equipment is key to avoiding coffee roasting mistakes and efficiently solving troubleshooting coffee roasting problems. The wrong machine can result in uneven roasts or pose safety risks, such as chaff buildup. Understanding how to sidestep these issues is crucial.

Comparing Different Roasters
Drum roasters use conductive heat for even browning but require manual skill. Hot air roasters rely on airflow, ideal for small batches. Hybrid models blend both methods. It’s important to know your machine’s heat transfer style to match your bean type.
- Drum Roasters: Best for full flavor development in medium to dark roasts
- Hot Air Roasters: Quick for light roasts but risk uneven heating
- Hybrid Roasters: Offer versatility but demand precise temperature control
Home vs. Commercial Roasters
Home models handle 0.5–2 lbs, perfect for hobbyists. Commercial machines scale up to 100+ lbs with advanced controls. It’s important to match capacity to your needs: 60% of roasters overload their machines, causing underdeveloped flavors. Commercial roasters ensure consistency but require a higher investment.
Maintenance Tips for Your Roaster
Neglecting upkeep causes 65% of fire hazards from chaff buildup. Follow these steps:
- Clear chaff trays after every batch to prevent ignition risks
- Wipe oil residues monthly to avoid rancid flavors
- Check temperature sensors annually for accuracy
Ignoring maintenance turns small issues into costly problems. A clean machine ensures reliable performance and avoids coffee roasting mistakes.
Not Taking Notes During Roasting
Professional roasters understand that tips for successful coffee roasting begin with meticulous tracking. Over 70% of home roasters acknowledge that inconsistent results often arise from neglecting documentation. By documenting each step, trial-and-error transforms into a path to consistent success.
Why Documentation is Crucial
Notes endure, while memories fade. Pro roasters document every 30 seconds to identify patterns. These records reveal how factors like humidity or bean origin influence flavor. Without documentation, troubleshooting defects such as bitterness or sourness becomes a mere guess.
Suggested Information to Record
- Roast date and bean origin
- Batch size and initial temperature
- Key timestamps (yellow point, first crack, end time)
- Environmental conditions (humidity, room temp)
- Subjective tasting notes (bitterness, acidity)
Pro tip: Monitor development time—the period after first crack—to control roast level. Professionals also note cooling time.
How to Use Your Notes for Improvement
Analyze logs from successful and flawed batches. For instance, improving coffee roasting techniques involves adjusting charge temperature if beans scorched previously. Create a collection of roast profiles for different bean varieties. Timing significantly impacts flavor:
| Roast Level | Time After First Crack | Flavor Focus |
|---|---|---|
| Light | End at first crack | Floral/fruit notes |
| Medium | 1-2 minutes post-crack | Balanced acidity/body |
| Dark | 3+ minutes post-crack | Chocolate/caramel tones |
Utilize your records to refine timing and prevent defects like quakers or baking. Each note brings you closer to achieving perfect batches!
Neglecting to Taste Your Coffee
Expert coffee roasting advice emphasizes tasting as the final step before serving. Without regular tasting, even the most advanced equipment and detailed notes can’t show how your roast performs. It’s crucial for adjusting roasting techniques to meet flavor goals.

The Importance of Tasting Tests
“Tasting connects the roaster’s craft to the drinker’s experience.”
Professional cupping sessions, like those by the Specialty Coffee Association, expose hidden flaws or strengths. They help identify if roast adjustments enhance or detract from flavor balance. This turns subjective preferences into quantifiable results.
How to Set Up a Tasting Session
Create a distraction-free space with these essentials:
- Pre-ground samples brewed with filtered water (chloramines in tap water taint taste)
- White cups to eliminate visual bias
- A scale and timer for consistency
- Evaluation forms to track changes over time
Roast samples should rest 24–48 hours post-roast to allow degassing. Taste daily if testing small batches.
What to Look for During Tasting
| Criteria | Description |
|---|---|
| Acidity | Bright, tangy notes vs. muted or harsh tones |
| Body | Texture ranges from thin to syrupy mouthfeel |
| Flavor Balance | Ensure no single note dominates the palate |
| Aftertaste | Should linger without bitterness or flatness |
Start with small adjustments—like roast time or temperature—and note changes in these categories. Over time, this builds the sensory vocabulary needed to refine your craft.
Skipping the Cooling Process
One of the common coffee roasting errors home roasters make is neglecting proper cooling. Cooling halts internal roasting, preventing bitterness and preserving the beans’ natural flavors. Without this step, beans continue cooking, turning nuanced notes into burnt or ashy tastes.
Why Cooling is Essential
Rapid cooling stops heat trapped in the bean’s core from overdeveloping flavors. Ideal cooling takes under five minutes, per SCA guidelines. Delaying this step risks uneven flavor profiles and harsh aftertastes. Pro roasters log cooling times alongside roast logs to track consistency.
Effective Cooling Methods
Choose from these methods to avoid pitfalls:
- Cooling trays with fans: Fastest method, ensuring even airflow
- Metal colanders: Affordable but require manual stirring
- Baking sheets: Simple setup but slower cooling speed
| Method | Pros | Cons |
|---|---|---|
| Cooling Trays | Even cooling, faster results | Requires equipment investment |
| Colanders | Low cost, accessible materials | Risk of bean spillage |
The Impact on Flavor and Aroma
“Cooling isn’t an afterthought—it’s the final safeguard for your roast’s quality.” – Specialty Coffee Association (SCA)
Proper cooling preserves volatile compounds like esters and acids that define acidity and sweetness. Poor cooling traps heat, accelerating degassing and flattening flavor. Beans need 24 hours post-cooling to stabilize, ensuring the best cupping results.
Avoiding this step leads to coffee roasting pitfalls like muted acidity or harsh bitterness. For example, a 200g batch cooled improperly can lose 30% of its floral notes, per SCA tasting studies. Prioritize cooling as part of every roast cycle—your palate will thank you!
Rushing Through the Roasting Process
Patience is crucial in coffee roasting. Rushing through steps can lead to beginner coffee roasting mistakes such as sour or uneven flavors. Here’s how to sidestep this common error.
The Risks of Rushing
Rushing can result in underdeveloped beans. Data reveals 25% of batches are scorched when temperatures rise too quickly. Key risks include:
- Grassy, sour notes from rushed drying phases
- Uneven browning due to skipped first crack development
- Loss of 30% of potential flavor complexity
Ideal Roasting Times
Adhere to these time ranges to sidestep troubleshooting coffee roasting problems:
| Roast Level | Total Time | Development Post-First Crack |
|---|---|---|
| Light Roast | 8–12 minutes | 30–60 seconds |
| Medium Roast | 12–14 minutes | 1–2 minutes |
| Dark Roast | 14–16 minutes | 2–3 minutes |
Temperatures must remain between 160–230°C (320–446°F) to prevent burning or underdevelopment.
How to Be Patient for the Perfect Roast
Master patience with these steps:
- Use a timer to track stages, not guess by sight alone
- Listen for first crack—wait 1–2 minutes before cooling
- Keep a roasting log to identify patterns in rushed batches
Avoid peeking too often; frequent opening lowers temperature stability. Over 20% of flavor defects come from rushed final stages. Stay calm and let chemistry work its magic.
Failing to Experiment with Techniques
Mastering the basics is just the starting point in coffee roasting. To truly grow, embracing experimentation is key. Every adjustment you make opens up new possibilities, transforming your roasting skills into a personal craft.
How Experimentation Improves Skills
Trying new methods sharpens your intuition for coffee’s nuances. Even small changes, like altering heat application or airflow, reveal how variables shape flavor. Expert coffee roasting advice often stresses that consistent experimentation builds confidence to innovate. Each failed batch teaches as much as a perfect roast, guiding you closer to your ideal profile.
Common Techniques to Try
Test front-loading heat (applying high heat early) versus back-loading (gradual increases). Adjust airflow during stages to control bean development. Compare resting times or blend roasts to see how profiles shift. Try roasting single-origin beans with different profiles to highlight their unique traits.
Encouragement for Creators and Innovators
Big names like Intelligentsia Coffee and Blue Bottle Coffee built their reputations through bold experimentation. Keep a log to track variables like temperature shifts or rest times. Even small adjustments, like shortening a roast phase by 30 seconds, can uncover hidden flavors. Remember, 25% of roasters skip logs, but tracking details ensures you can repeat successes. Don’t fear mistakes; they’re the building blocks of mastery.
FAQ
What are the most common coffee roasting mistakes?
Why is understanding roast profiles important?
How does the freshness of green coffee beans impact the roasting process?
What types of roasting equipment should I consider for home roasting?
How does documentation improve my coffee roasting skills?
Why is tasting coffee regularly important?
What are some effective cooling methods after roasting?
What should I avoid when roasting coffee?
How can I experiment to improve my coffee roasting?

Robert Lowe is a writer at WyNeeds, where he shares his expertise and passion for coffee. With a deep appreciation for the art of brewing, he explores various coffee techniques, bean origins, and industry innovations. His engaging and informative content helps coffee lovers of all levels discover new flavors, refine their brewing skills, and stay updated on the latest trends in the coffee world.